Happy Halloween - Freebies: What You Need to Know Before Downloading and Using These High-Resolution PNG Assets
When you search for Halloween-ready design assets, you may come across a set called Happy Halloween - Freebies. The promise is appealing: high-resolution PNG files at 300 DPI with a transparent background, each element sized at 3000 x 3000 pixels. That is a generous canvas for anything from T-shirt designs to scrapbook embellishments. But before you download and start using these files, there are a few things worth understanding. Many people jump into using free design assets without checking key details, and that can lead to frustration, wasted time, or disappointing results.
This article is a practical guide to what Happy Halloween - Freebies actually includes, what common mistakes to avoid, and how to make the most of these assets for your projects. Whether you are a small business owner designing merchandise, a freelancer creating invitations, or a hobbyist working on wall decor, the advice here will help you save effort and get better results.
What Happy Halloween - Freebies Actually Offers
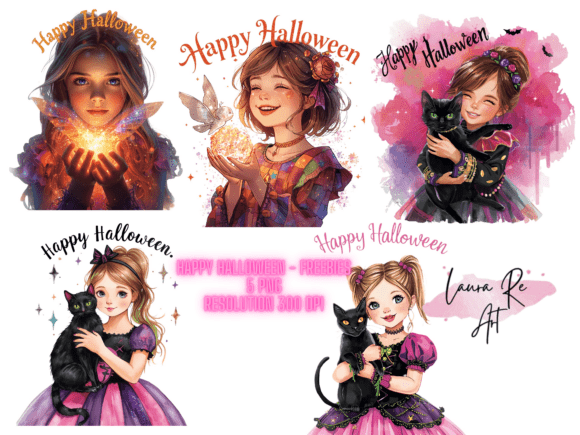
Happy Halloween - Freebies refers to a collection of pre-made Halloween-themed graphic elements. The key selling points are the file specifications: each PNG has a transparent background, 300 DPI resolution, and a large 3000 x 3000 pixel size. The bundle may contain five separate PNG files, each with a different Halloween motif such as pumpkins, bats, ghosts, or lettering. Because they come in PNG format with transparency, you can layer them over different backgrounds, combine them with other graphics, or print them directly on physical products.
What makes this set attractive is the print-ready resolution. At 300 DPI, these images are suitable for professional print projects—unlike many freebies made at lower web resolution. The transparent background also saves you the trouble of manual cutouts. But here is where many people make their first mistake.
Common Misunderstanding: "Transparent Background Means It Works Everywhere"
A transparent PNG is not a magic bullet. It removes the solid background, but the image itself may still have semi-transparent edges, subtle halos, or antialiasing that appears as a faint outline. When you place the PNG on a dark-coloured T-shirt or a deep purple party invitation, those slight edge artefacts can become visible. This often surprises users who expect a perfect blend.
To avoid this, take a minute to open the file in a proper editing tool (like GIMP, Photoshop, or even a decent free online editor) and preview it against different background colours. If you see a white or grey fringe around the edges, you can remove it using a “matting” or “remove halo” function. In Photoshop, the Layer > Matting > Defringe tool works well. For free tools, you can sometimes use the colour selection tool to clean up stray pixels.
Another oversight is assuming transparency works seamlessly on all print-on-demand platforms. Some print providers use their own mockup tools that may not handle transparency correctly, replacing it with white or black. Before ordering physical products such as mugs or stickers, export a test version of your design with the background flattened to the colour you intend to print on, and check the mockup preview carefully.
Mistake: Ignoring the 3000 x 3000 Pixel Size
At 3000 x 3000 pixels, each file from Happy Halloween - Freebies is large enough for high-quality prints up to about 10 x 10 inches at 300 DPI. Many users assume bigger is always better, but that size can cause issues when you need to scale the graphic down for small products like stickers or buttons. If you simply resize the image without preserving aspect ratio, you may distort the design. Worse, you might inadvertently discard resolution data.
A better approach is to always work from the original 3000 x 3000 file and scale downwards using a tool that applies proper resampling. In most editing software, choose “bicubic sharper” for reduction. Also, keep a copy of the original file untouched. If you later need a different crop or layout, you will regret flattening and saving over the source.
Also note: 3000 x 3000 is a square size. If your project requires a rectangular canvas—for example, a tall mug or a wide banner—you will need to add additional background or creative space around the element. Do not stretch the PNG to fill a non-square space; instead, place it within a larger document and use other complementary graphics or a solid colour fill to complete the composition.
Overlooked Detail: 300 DPI Is for Print, Not for Screen
Many beginners think 300 DPI automatically makes an image look better on screens. That is not how it works. DPI (dots per inch) is a print resolution concept. On digital displays, what matters is pixel dimensions. A 3000 x 3000 pixel image at 72 DPI and a 3000 x 3000 pixel image at 300 DPI will look exactly the same on a screen. The DPI tag only matters when you print. So do not be fooled into thinking “300 DPI” means higher quality for website graphics or social media posts. For web use, you can safely ignore the DPI setting, but the large pixel size gives you flexibility for zoom details.
If your goal is to use these assets exclusively for digital invitations or social media stories, the 3000 x 3000 size will be unnecessarily heavy and slow to load. You should resize the PNG to a standard screen resolution such as 1920 x 1920 or 1080 x 1080 pixels before uploading. This keeps file sizes manageable without losing noticeable detail. Many users skip this step and end up with sluggish editing software or large email attachments.
Practical Advice: Check Compatibility with Your Software
PNG is widely supported, but not all tools handle transparency the same way. Some older versions of word processors, presentation software, or basic design apps may display transparent areas as black or white. If you plan to use these assets in Microsoft Word, Canva (free version), or similar programs, open the file first in a test document. Look for unexpected colour blocks around the design.
If you notice that the transparent area turns into an unwanted colour, you have two options. One is to open the PNG in a proper image editor and manually set the background to a colour that matches your project—then save as a JPG or PDF. This removes transparency but solves the compatibility issue. The other option is to use a design tool that handles PNG transparency correctly, such as Canva Pro, Adobe Express, or any professional software.
For those who plan to print on physical products, also check whether your print provider accepts PNG files directly. Many require flattened TIFF or PDF with CMYK colour mode. Happy Halloween - Freebies files are most likely in RGB, which is standard for digital use. For printing, you are better off converting to CMYK after layering your design, and then outputting a print-ready file. Ignoring colour mode can result in off-colour prints—especially for Halloween oranges, purples, and greens, which shift when converted incorrectly.
Common Mistakes in Applying These Freebies
1. Using the elements exactly as they are without personalisation. Many people download free PNGs and slap them onto a T-shirt mockup with no additional treatment. The result often looks generic and unprofessional. Instead, consider adding your own text, adjusting colours, or combining multiple elements from the set to create a unique composition. Even small edits like changing the hue of a pumpkin or adding a drop shadow make the design feel yours.
2. Forgetting about print margins and safety zones. Because the PNG is 3000 x 3000 pixels, it is tempting to fill the entire surface. But most physical products require a bleed area (extra space around the edge) and a safety margin where critical text or elements should not go. If you place the graphic edge-to-edge, parts may be trimmed off during production. Leave at least 0.125 to 0.25 inches of padding for products like stickers and business cards, and more for mugs or T-shirts where wraparound is involved.
3. Not testing print quality on your own printer first. If you are printing at home on cardstock or vinyl, run a test print on plain paper. Check that the 300 DPI resolution really holds up, that black areas are not muddy, and that the transparency edges are clean. This small step prevents wasting expensive materials.
What to Check Before You Commit
Before you invest time in a project with Happy Halloween - Freebies, verify these points:
- Licence terms. Are the files free for commercial use? Some freebies restrict use to personal projects, require attribution, or limit the number of printed items. Read the fine print on the download page carefully. If you plan to sell T-shirts or mugs with these designs, ensure you have the correct licence to avoid legal issues.
- File integrity. Download and unzip the files immediately. Check that all five PNGs open correctly and that there is no corruption. Rarely, free download packs may have missing colour profiles or truncated files.
- Colour profile. Open the files in your editor and check the colour profile. If it sRGB (standard for web), you may need to convert to CMYK for professional offset or screen printing. For home inkjet printers, sRGB works fine, but always verify with a test print.
- Scalability beyond 3000 x 3000. If you need larger prints (posters or banners), enlarging a 3000 x 3000 pixel image will cause pixelation. The freebies are not vector files, so they cannot scale infinitely. For large-format printing, either use them at their native size or accept some quality loss.
Better Approaches for Different Uses
For T-shirts: Use one element as the main design, centred on the chest. Add the phrase “Happy Halloween” or a catchy tagline in a contrasting font. Keep the artwork at least 10% smaller than the print area to avoid the edges of the shirt seam.
For stickers and cards: Combine two or three PNG elements into a layered composition, with the largest in the background. Pay attention to overlapping transparency—sometimes two transparent images stacked can create unexpected darkening. If that happens, flatten the layers or add a white shape behind the top element.
For mugs or framed art: Since mugs have curved surfaces, keep the design away from the mug’s seam. For framed wall decor, use the full 3000 x 3000 file centred on an artboard with a decorative border or Halloween-themed pattern around it. A simple black or orange frame completes the look.
A Final Word on Quality and Satisfaction
Happy Halloween - Freebies provides a solid starting point for Halloween-themed projects, especially if you appreciate the convenience of ready-to-use high-resolution PNGs with transparency. The key to getting good results is to treat these files as raw materials, not finished products. Spend time cleaning edges, adjusting colours, checking compatibility with your tools, and testing prints. Doing so transforms a simple freebie into a polished asset that stands out. Avoid rushing, and always preview your work against the specific product you are targeting. That extra attention will save you money, reduce waste, and leave you with products that look as good on your customers as they did in your mind.